Catalina 22 LED Cabin Lights. |
 |
|
|
||
|
|
||
|
|
||
|
|
Overview of LED cabin lights conversion
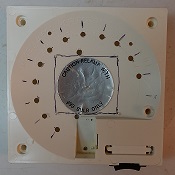
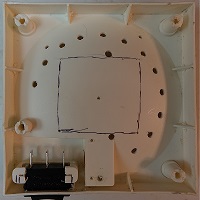
The original cabin light fixtures in the 1985 Catalina 22 were damaged by corrosion. If they had worked, they would have been very inefficient by modern standards. Therefore, something needed to be done. Replacing the cabin light fixtures with original equipment didn't look like the best idea. Although there are more efficient modern cabin lights available, those prices seemed prohibitive.The plastic parts of the old lights, although a bit dated, weren't worn out. The corroded and inefficient electrical components were the main problem. What about replacing just the electrical parts with more modern components? A quick search on Amazon turned up very affordable LEDs and switches. While updating the cabin lights, why not add the ability to select between bright white lighting and lower level red light to preserve night vision? I mean, those red LEDs were really cheap.
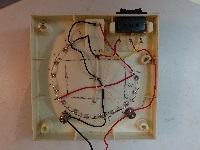
So a plan took shape to replace the SPST rocker switch in each fixture with a similar looking SPDT rocker switch. The original incandescent bulb and socket could be replaced with a printed circuit board module having dozens of surface mounted white LEDs. To add the dim red lighting feature, a dozen small red LEDs could be arranged in around the central white LED module.
LED cabin light calculations
In cobbling together a prototype, and powering it with a lab bench top power supply, it was discovered that, although the white LED module would produce fairly consistent brightness over the anticipated range of actual battery voltage (10.5V to 14.V), the red LEDs posed a bit of a challenge. With about 2.V drop across each red LED, five in series would light up well at 10.V, but wouldn't survive 14.V Similarly, seven in series made lots of light at 14.V but were hopelessly dim at 10.V. The solution chosen was a separate adjustable voltage regulator in each fixture to power the red LEDs. Four red LEDs in series would be bright and reliable at 8.V. A dozen red LEDs put out about the right amount of light per fixture for one to find their way around in the cabin at night, although certainly not enough light to read by. So the dozen 5mm LEDs were wired in a series/parallel network of three parallel strings of four series LEDs each. Reading and experimenting determined that these red LEDs started putting out good light at around 10.mA of current, and could survive up to 20.mA long term. Multiplying those values by three (the number of strings in parallel) gave a current range of 30.mA to 60.mA for the 12 LEDs in a fixture. After each fixture was wired. its voltage regulator was turned down to well below 8.V. With a sensitive current meter in series with one power lead to the fixture, and the light switch in the red position, the voltage regulator was turned up until the current reached 45.mA.LED cabin light pictures
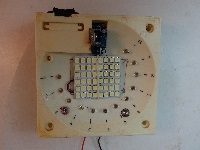
| These two photos provide a slightly better view of the adjustable voltage regulator module installed. Note how this particular module fits neatly where the original light bulb bayonet socket was mounted. The long sides of the circuit board needed to be sanded down slightly to get a snug fit. | 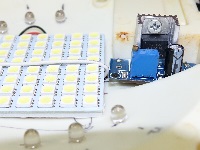 Voltage regulator installed. |
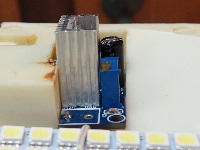 Another view. |
| Photos of the LED conversion lit up showingboth colors. The
camera used adjusted the photos to appear equal brightness. Be
assured the two different color LEDs installed do not produce the same amount of light. That bright crecent in red mode might be reduced by using 'frosted' or tinted red LEDs, at the sacrifice of some overall brightness. Consider it incentive to drill the pattern of holes for the red LEDs precisely. |
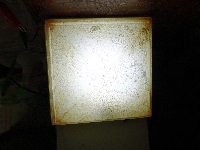 Switched to white. |
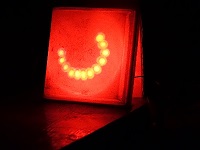 Switched to red. |
Pieces Parts Sources And CostsQuantities and line costs are per light fixture, totaling around $8.25.Purchase quantities are based on modifying about four fixtures. Shop around for the electronic components; price and availability change frequently. |
||||||
|
|
|
|
|
|
|
|
| Original square plastic light. | 1 | Catalina | You didn't toss them, right? | |||
| 12V LED white panels. | 1 | Amazon B01LW2NBK6 |
$9.99 /4 |
$2.50 | $2.50 | Consider color temperature. |
| Red 5mm LEDs. | 12 | Amazon B01AUI4WC8 |
$5.57 /100 |
$0.06 | $0.67 | |
| SPDT rocker switch. | 1 | Amazon B0716BKJG3 |
$7.15 /5 |
$1.43 | $1.43 | |
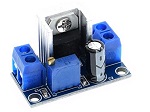
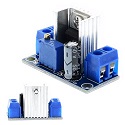
| Adlustable LM317 voltage regulator. | 1 | Amazon B07LF3BYQZ |
$1.31 | $1.31 | $1.31 | |
| Machine screws SS or brass. (wiring terminals) |
2 | Ace Hdwr |
each | $0.15 | $0.30 | Fastener prices are estimates based on experience. |
| Nuts SS or brass. | 4 | Ace Hdwr |
each | $0.15 | $0.60 | |
| Flat washers SS or brass. | 4 | Ace Hdwr |
each | $0.10 | $0.60 | |
| Lock washers SS. | 2 | Ace Hdwr |
each | $0.10 | $0.20 | |
| Self-tapping screws SS. (to mount lights) |
4 | Ace Hdwr |
each | $0.25 | $1.00 | |
| Misc. wires, solder, etc. not priced. | Your junk pile, right? |
I used fine strand, fully tinned 24 awg with Teflon insulation, but 22 awg solid copper & PVC hookup wire will work just fine. | ||||
